
Spitfire restoration Project
Working in London means that I get the train to work every day and as a result my 1971 'K' reg Mk4 Spitfire has retired. This has given me the opportunity to start to restore the car.
I started off by replacing the dashboard. This may seem a strange place to start but I had to start somewhere! The plastic dash is now made of walnut and looks really cool. This also means that I can now fit the extra dials I want in the car.
For an experiment, I placed an add in a local paper asking for any old Spitfire bits. Before too long the phone started ringing and soon I had been offered a complete car. I got the car home and started to look it over. Although the body was rotten and the engine was blown, the gearbox was a type "D" overdrive box, the chassis looks like it has never been used and the fibre glass bonnet was almost new . This gave me the idea of rebuilding my car. I stripped down the car I had just bought, scrapping the body and engine block and set to work rebuilding my MMU32K.
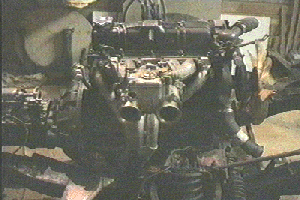
Below is the story so far, the engine has only done about 6000 mile from new. I bought it about 4 years ago and it is a Leyland Gold seal exchange unit. So far I have fitted a Triumph Tune Fast Road 83 Weber Profile Camshaft, 4-2-1 Triumph Tune Exhaust and a single Weber 40 DCOE carburetor. It produces about 70 bhp. at the fly wheel.
3rd March 1996
Over the last week, I have wire brushed the new chassis and started to paint it with Black Hammerite. I want to make sure that it will never rust! I have also stripped down the suspension and started dismantling the old car. All that remains now is to put a new floor in the body, finish off the chassis, put the body on the chassis, fit a new wiring loom etc etc etc.... This will involve lifting the body off of its original chassis, cutting out the rotten floor pan and welding in a new one.
14th March 1996
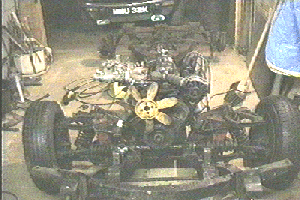
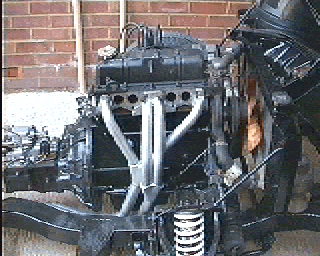
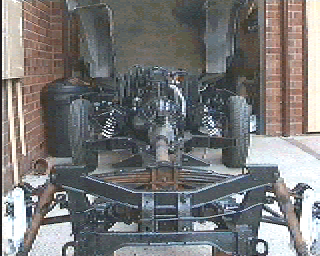
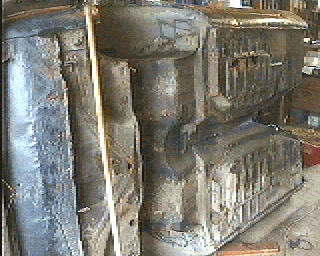
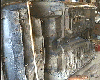
The chassis is now finished (at last!). The engine, gearbox, brakes, radiator, front valance and bonnet are all in position. I am now starting work on the body.
14th March 1996
The chassis is now finished (at last!). The engine, gearbox, brakes, radiator, front valance and bonnet are all
in position. I am now starting work on the body. T The chassis is now finished (at last!). The engine, gearbox, brakes,
radiator, front valance and bonnet are all in position. I am now starting work on the body. The body is now off of it's chassis and on it's
side in the garage. At a quick glance, it did not appear that the floor was that bad
14th March 1996
T The chassis is now finished (at last!). The engine, gearbox,
brakes, radiator, front valance and bonnet are all in position. I am now starting work on the body.
14th March 1996
25th March 1996
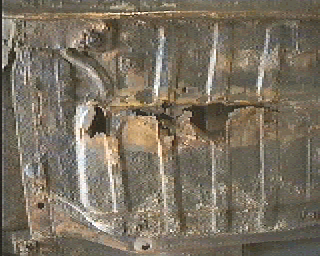
The body is now off of it's chassis and on it's side in the garage. At a quick glance, it did not appear that the floor was that bad :
This initial impression was short lived. On a closer inspection it is apparent that floor is rotten!
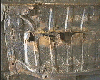
The entire drivers side floor pan was cut out and a new floor pan has now been welded in place.
3rd May 1996
The car has been parked on it's side in the garage now for some time, so I thought I had better get on with it. Cutting out the passenger side floor pan, left a rather tatty sill. So I decided to replace that as well. I cut off the sill and under that was another sill. I cut that one off ,and under that was another sill (and NO, I'm not repeating my self!), I cut that one off and under that were pages and pages of a 10 year old newspaper. So I think that it is fair to say that once the car is finished it should perform even better due to it's greatly reduced weight.
Anyway, I'm off work next week and I am going to attempt to get it back onto it's chassis... Any volunteers ? It is rather too heavy for one person to carry !
14th May1996
The body has finally been repaired. In all ---- both floorpans, the boot floor and rear valance, the "heel board panel", the offside sill and wing extension and the offside inner sill have all been chopped out and replaced. The body has now been re-introduced to the chassis and all the bits and pieces connected. The boot floor was hand made out of a sheet of steel.
I put the key in the ignition and ..... low and behold it started.... ! The new gearbox seems to be working fine although I am having some trouble wiring up the overdrive unit. (John at the Triumph Six Sports Club is in the process of digging out a wiring diagram for the overdrive unit).
While the car is still in a thousand and one pieces I thought I would strip down the wiring loom and replace any tatty or burnt out wires, this also will give me the chance of including any extra wires in one loom, as opposed to running the wires outside of it, i.e. oil pressure gauge, ammeter etc. This will hopefully give the appearance of a much tidier underside to the dashboard, without any dangling wires. I have decided not to recover the loom until the car is finally finished.
All that remains to do now is a small amount of welding to the body and the inside of the car. Next I will have to fill any gaps that have been created, paint and underseal the bottom of the car fit new body mounting felts.